Troubleshooting
The drive will not boot: a working checklist
Work down the list in order. Each step rules something out, and the order is chosen so the cheap checks come before the expensive ones.
Key points
- Not listed is a firmware or preparation problem; listed but failing is an image problem.
- Change one thing at a time, and write down what you changed.
- Record the exact wording of any error before rebooting.
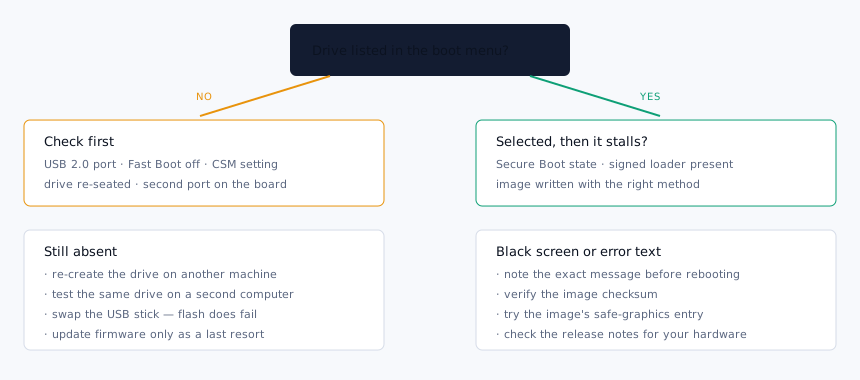
The drive is not listed
Try a different port
Use a port directly on the motherboard, on the back of a desktop, and prefer USB 2.0 if one exists. Hubs, front panels and USB-C adapters are all plausible culprits. Some firmware initialises USB 3 controllers late enough to miss the drive.
Open the one-time boot menu, not the boot order
F12,F9,F11,EscorOptiondepending on the vendor. If the drive is there, the boot order was the only problem.Turn off Fast Boot
Fast Boot skips USB enumeration on many machines. It sits in firmware setup, sometimes under a different name such as Quick Boot or Ultra Fast Boot.
Match the firmware mode
A drive prepared for legacy boot will not appear on a UEFI-only machine, and the reverse. If CSM exists, note its state. The mode comparison is here.
Check the drive on another computer
If it appears elsewhere, the problem is that machine's settings. If it appears nowhere, the drive was not prepared as you thought.
It is listed but stalls
- Secure Boot refusing an unsigned loader — expect wording about a security violation or an invalid signature.
- A corrupt image — verify the checksum before anything else. This is the single most common cause of a boot that starts then dies.
- The wrong preparation method for that image — some images must be written raw and will not survive a file copy.
- Graphics initialisation — try the image's safe graphics or basic display entry if it offers one.
- A slow stick — a blank screen for ninety seconds can be a very cheap drive rather than a failure. Wait it out once.
Reading the message
| On screen | Usual meaning | Where to look |
|---|---|---|
| No bootable device / Operating system not found | Firmware found nothing it could start | Preparation method and partition scheme |
| Security Violation / Invalid signature | Secure Boot rejected the loader | Secure Boot |
| Missing operating system | Boot code present, target missing | Rebuild the drive; check the image is complete |
| Blinking cursor, nothing else | Stage-one code ran, stage two did not | Partition scheme, boot flag, image integrity |
| Kernel panic shortly after start | Corrupt image or unsupported hardware | Checksum first, then the release notes |
Isolating the cause
Three variables are in play: the drive, the image, and the machine. Change one at a time.
- Same drive, different machine — tests the machine's settings.
- Same machine, different drive — tests the stick.
- Same drive, different image — tests the image and the preparation method.
- A virtual machine set to boot from the USB device — tests the drive with the physical machine taken out of the picture.
Keep notes. Two settings changed at once is how a working configuration becomes irreproducible. One line per attempt in a text file is enough.
When it is the hardware
Flash memory fails, and it fails quietly: writes appear to succeed and read back as something else. Suspect the stick when a verified image produces a drive that fails verification, when the same image works from a different stick, or when write speed has collapsed compared with when the drive was new.
Counterfeit capacity is worth a mention too. A drive sold as 512 GB that is physically 32 GB will accept files and lose them silently. If a bargain-priced stick behaves inexplicably, test its real capacity before spending another evening on the firmware settings.
Before a firmware update. Updating motherboard firmware to fix a USB boot problem is a legitimate last resort, not a first move. Read the vendor's notes, ensure stable power, and understand the recovery procedure for that board before you start.